Introduction
In the first part of this series I showed you the final result of the marketplace solution. We will now start to create this solution. This part will describe the creation of the posting content type and two page lay-outs.
Step 1: Create site columns
We will begin with creating site columns so our users can fill the details of the postings in the marketplace. The following columns need to be created:
| Name | Type | Group | Other |
| Type of posting | Choice: – For Sale – Wanted |
Contoso Site Columns | Required field |
| Posting category | Choice: – Computer – Books – Household |
Contoso Site Columns | Required field |
| Price | Currency | Contoso Site Columns | Required field |
You are of course free to change this to fit your specific needs.
Step 2: Create site content type
We are now going to create a new site content type, including the site columns from the previous step, to let our users create new postings. The following details apply:
Name:
Posting
Select parent content type from:
Page Layout Content Types
Parent Content Type:
Article Page
Group:
Contoso Content Types
Before we add our site columns we have to hide the columns we don’t need for our posting. Let’s hide the following columns:
- Comments
- Scheduling Start Date
- Scheduling End Date
- Contact E-mail Address
- Contact Name
- Contact Picture
- Rollup Image
- Target Audiences
- Page Image
- Summary Links
- Byline
- Image Caption
Now we are ready to add our new columns by clicking at Add from existing site columns. Don´t forget to set the column order. I prefer the following order:
- Name
- Title
- Article Date
- Posting category
- Type of posting
- Price
- Contact
- Page Content
Step 3: Create a custom page lay-out for the welcome page
The welcome page of the marketplace, with the for sale and wanted postings, is defined in a page lay-out. To create a new page lay-out we have to open our site in SharePoint Designer. Click at Page Layouts in the Navigation. We can select New Page Layout from the ribbon:
Select the following:
- Content Type Group:
- Page Layout Content Types
- Content Type Name:
- Article Page
- URL Name:
- Marketplace welcome page
- Title:
- Marketplace welcome page
Click at Ok. We can start editing our new page lay-out! We have to add the following lines:
<table style=”width: 100%”>
<tr>
<td>
*Add webpart zone here*
</td>
</tr>
</table>
<table style=”width: 100%”>
<tr>
<td>
*Add webpart zone here*
</td>
<td style=”max-width:50%;”>
*Add webpart zone here*
</td>
</tr>
</table>
We have to make sure this is placed between the following lines:
<asp:Content ContentPlaceholderID=”PlaceHolderMain” runat=”server”>
</asp:Content>
We can Save the page lay-out and start adding new web part zones. Remove the *Add webpart zone here* and click at Insert and Web Part Zone in the ribbon. Once this is done result should look something like this:

We can check in, publish and approve the page lay-out and we are on our way to the next page lay-out!
Step 4: Create a custom page lay-out for a posting
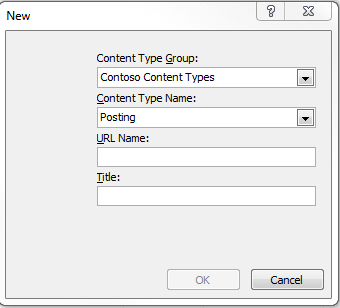
We need one more content type for the creating a new posting. Let’s create a new page lay-out like we did in the previous step but this time we select a different content type:
- Content Type Group:
- Contoso Content Types
- Content Type Name:
- Posting
- URL Name:
- Posting
- Title:
- Posting
Click at Ok. We can start editing this page lay-out. We have to add the following lines:
<div>
<div>
<div>
*Enter Title field here*
</div>
<div>
<h3>Page content</h3>
*Enter page content field here*
</div>
<div>
<h3>Posting category</h3>
*Enter posting category field here*
</div>
<div>
<h3>Type of posting</h3>
*Enter type of posting field here*
</div>
<div>
<h3>Article date</h3>
*Enter article date field here*
</div>
<div>
<h3>Price</h3>
*Enter price field here*
</div>
<div>
<h3>Contact</h3>
*Enter contact field here*
</div>
</div>
</div>
We have to make sure this is placed between the following lines:
<asp:Content ContentPlaceholderID=”PlaceHolderMain” runat=”server”>
</asp:Content>
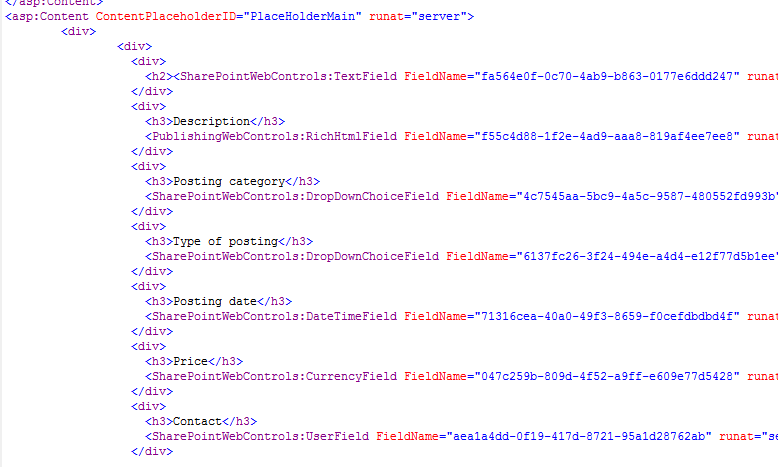
You are of course free to style the fields by using CSS. We will have to add the columns associated to the content type. The toolbox, at the right side of the screen, contains the columns under the header SharePoint Controls and Content Fields. Just drag and drop the fields from the toolbox to the line in the page lay-out. This results in the following:
We want our users to be able to leave a comment on a posting, so we have to add the note board web part. Add the following lines under the last </div>:
<br/>
<h1 style=”font-size:14px;”>Comments:</h1>
* Add Note Board web part here
</div>
</div>
Just remove the Add Note Board web part here line and add the Note Board Web part (Be sure to activate the SharePoint Server Standard Site Collection features). We are now finished! Save, publish and approve the page lay-out.
In the last part of the series I will show you how to configure to site and web parts.
hi, Is there a video demonstrating the steps – the text is unclear unfortunately